The Mod That Starts It All
I can walk into any parking lot during a cars and coffee event and pick out the cars that started their suspension journey the same wrong way. They sit low. The wheel gap is perfect. The stance looks aggressive in a photo. Then I watch them drive away. The rear end bounces twice over a speed bump. The front end skips mid-corner over a small patch of uneven pavement. The driver steers carefully, not because he is being cool, but because he knows the car is not really planted.
This is the suspension mistake almost everyone makes first: installing lowering springs on factory dampers without understanding what the two parts need from each other.
I have fixed this mistake more times than I can count. The story is always the same. The owner wanted less wheel gap and a sportier look. A set of lowering springs cost a few hundred dollars. The installation took a Saturday. The car looked right. For about a week.
Then the ride went wrong. The car felt bouncy on the highway. It bottomed out on dips it used to absorb. The steering developed a nervousness that made the car feel twitchy rather than sharp. The owner thought he had improved the suspension. What he had done was remove the suspension’s ability to do its job.

What Actually Happens When You Lower on Stock Dampers
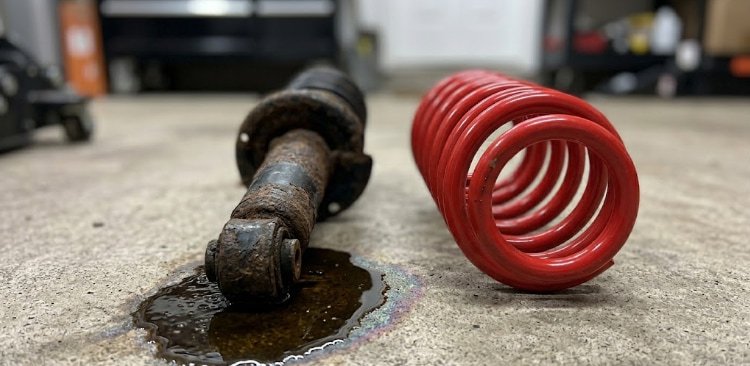
A shock absorber and a spring are not independent parts. They are a matched system. The spring carries the weight of the car and determines ride height. The damper controls the speed at which the spring compresses and rebounds. When you change one without changing the other, the system falls out of balance.
Lowering springs are almost always stiffer and shorter than factory springs. They have a higher spring rate to prevent the car from bottoming out on the reduced suspension travel. That higher spring rate demands more damping force to control the spring’s movement. A factory damper was designed for a softer, taller spring. It does not have enough rebound damping to control the stiffer lowering spring, so the car bounces after every bump. It does not have enough compression damping to manage the energy of a harder hit, so the car crashes through potholes instead of absorbing them.
Beyond the ride quality degradation, there is a geometric problem. Lowering the car changes the angle of the control arms, which alters the roll center and the camber curve. On many platforms, lowering more than an inch without correcting the geometry reduces front-end grip instead of increasing it. The car looks like it should corner harder. In many cases, it corners worse than stock.
The owner paid money and spent a weekend to make his car less comfortable and less capable. That is not a modification. That is a downgrade.
The Comparison Table
What They Did | What It Actually Caused |
|---|---|
Installed lowering springs on stock dampers | Bouncy ride from insufficient rebound damping |
Dropped ride height 1.5 inches | Reduced suspension travel, constant bump stop engagement |
Kept factory shock mounts | Accelerated wear on already-aged rubber components |
Did not realign the car | Toe change from the drop, uneven tire wear within 3,000 miles |
Chose the lowest advertised spring | Spring rate mismatched to damper, no suspension compliance over broken pavement |
Skipped checking control arm angles | Roll center dropped below ground, reduced cornering grip |
I have diagnosed cars that felt dangerous in an emergency lane change because the rear end would step out unpredictably. The owner blamed the tires, the alignment shop, or the car itself. The problem was a set of lowering springs with spring rates nearly double the factory spec, paired with dampers that had 80,000 miles of wear and could not control a pogo stick.
The Right Way to Start
The suspension is not a visual modification. It is a mechanical system that keeps your tires in contact with the road. Treat it that way from the beginning, and you will avoid the cycle of buying cheap, hating the car, and paying twice to fix it.
Here is the sequence I recommend for anyone who wants a street car that handles better than stock and does not punish the driver.
Step 1: Replace Worn Factory Components First
Before you change anything, inspect every bushing, ball joint, tie rod end, and shock mount. A car with 80,000 miles on original suspension components is not ready for any performance upgrade. The new parts will expose the slop in the old parts and make the car feel worse. Replace what is worn. Get the stock suspension back to factory tightness. Then decide what actually needs improvement.
Step 2: Define Your Real Use Case
A car that sees nothing but smooth highways can tolerate a firmer setup than a car that navigates Brooklyn potholes every day. A car that carries passengers needs more suspension compliance than a car that only carries the driver. Do not choose a spring rate based on what a forum hero runs on his track car. Choose a spring rate that matches the road surface quality and usage pattern of your actual life.
Step 3: Choose a Matched Damper and Spring Package
This is the non-negotiable step. A quality set of coilovers or a matched spring-and-damper combo from a manufacturer that actually dyno-tests its dampers will transform the car. The spring rate and damper valving are engineered to work together. The ride height is adjustable within a range the damper can handle. The result is a car that feels composed, not chaotic.
Step 4: Get a Real Alignment
Lowering the car changes toe, camber, and caster. A proper alignment — not a “set the toe and let it go” job from a chain shop — will restore stability, eliminate tire wear problems, and let the new suspension actually do its job. I wrote about this in detail in another piece. The alignment sheet matters more than the parts themselves.
Step 5: Drive the Car for a Month Before Changing Anything Else
Let the suspension settle. Learn what the car does now that it did not do before. Identify any remaining weaknesses before throwing more parts at the problem. Good suspension tuning is iterative, not impulsive.

The Mistake I Still Understand
I do not blame anyone for making this mistake. Lowering springs are affordable, available, and marketed as a simple upgrade. The photos look great. The price is low enough that it feels like a low-risk decision. The car industry has spent decades telling enthusiasts that a lower car is a better car, and the message works because a car with a tight wheel gap does look more purposeful.
But looking purposeful and being purposeful are different things. A suspension that does not control the car is a liability, not an upgrade. A car that bounces through a corner is not fast. It is unsettled. Unsettled cars lose grip. Lost grip leads to guardrails, ditches, and phone calls you do not want to make.
If you are considering lowering springs as your first suspension mod, I am not going to tell you not to do it. I am going to tell you to save for another two months and buy a matched spring-and-damper package instead. The car will ride better, handle better, and hold its value better. You will not spend a Saturday installing parts that make you hate driving your own car.
The suspension is the most important system on a street car after the brakes. It deserves more thought than a spring catalog and a credit card. Give it the thought it deserves.